Reedford
A river to cross, by the bridge or the western ford. The town sits on the east side of the near edge and Haskett in the far west corner, so the road cannot run straight at him. A river splits the map into two routes: the road crosses on a bridge in the east, and a swamp ford hugs the west edge. North of the river a block of mountains keeps the routes apart until they meet in front of him: the road bends west and reaches his gate past a horde, while the ford route climbs the west strip and comes at him from the south past no horde, but over slow ground.
- Days
- 15
- Tiles
- 10×18
- Lairs
- 9
- Wardens
- 3
- Mines
- 2
- Dwellings
- 2
- Chests
- 4
- Piles
- 8
- Places
- 6
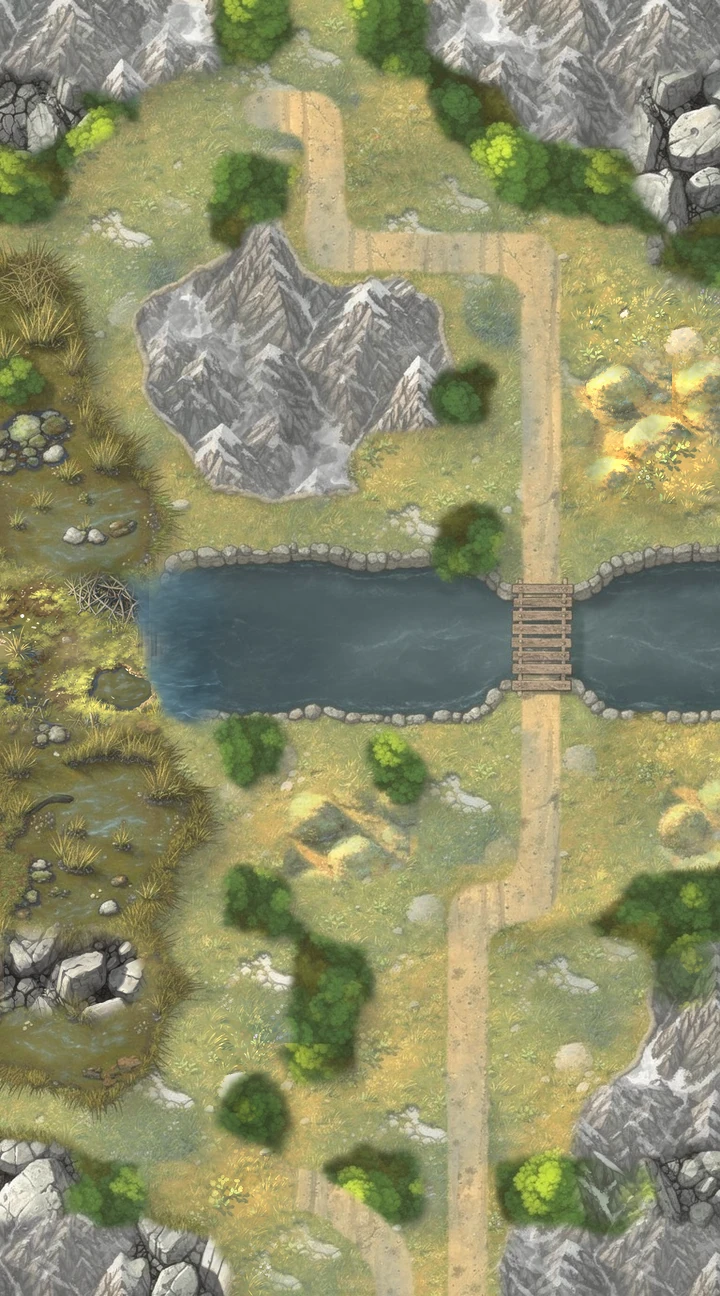 THLLLLWWLWLMMDDCCCCPPPPPPPPSSSSSS
The match
You start in the town with the army of the people you picked and have 15 days; the day after the last one the match is lost. Haskett stands at 10% of his full might on day one here (48 hit points) and grows from there (how he grows). His lair opens once you have broken 2 of 3 wardens. The hero moves 12 points a day and each tile costs its ground:
| Ground | Tiles | Move cost |
|---|---|---|
| Road | 22 | 1 |
| Grass | 65 | 2 |
| Forest | 24 | 3 |
| Hills | 9 | 3 |
| Swamp | 9 | 4 |
| Water | 14 | impassable |
| Mountain | 30 | impassable |
| Rock | 7 | impassable |
Where everything sits
Columns count from the west edge, rows from the near edge where the town is. The contents of lairs, piles and chests are drawn from the match seed; the tiles are always these. Each one-time place (S) offers two choices once and is spent after (what each offers).
| Object | Where | Notes |
|---|---|---|
| T Your town | column 7, row 3, the near third | |
| H Haskett’s lair | column 3, row 17, the far third, west side | |
| L Lair (a few) | column 7, row 5, the near third | holds the road |
| L Lair (a few) | column 2, row 6, the near third, west side | guards the ore mine beside it |
| L Lair (a few) | column 3, row 8, the middle third, west side | holds the road |
| L Lair (a pack) | column 8, row 8, the middle third, east side | holds the road |
| W Warden | column 1, row 11, the middle third, west side | holds the road |
| W Warden | column 10, row 12, the middle third, east side | guards the chest beside it |
| L Lair (a horde) | column 8, row 13, the far third, east side | holds the road |
| W Warden | column 9, row 14, the far third, east side | guards the wood mine beside it |
| L Lair (a horde) | column 4, row 17, the far third, west side | stands at Haskett’s gate |
| M Ore mine | column 1, row 6, the near third, west side | 2 ore a day once flagged |
| M Wood mine | column 10, row 14, the far third, east side | 2 wood a day once flagged |
| D Wolf Lodge | column 3, row 4, the near third, west side | 10 Dire Wolves a week; the Peatholm hire Eelcatchers |
| D Drake Roost | column 9, row 16, the far third, east side | 1 Drake a week; the Peatholm hire Shrinebacks |
| C Chest | column 4, row 2, the near third, west side | |
| C Chest | column 6, row 12, the middle third | |
| C Chest | column 10, row 13, the far third, east side | |
| C Chest | column 1, row 16, the far third, west side | |
| P Gold pile | column 8, row 2, the near third, east side | |
| P Crystal pile | column 1, row 4, the near third, west side | |
| P Pile | column 10, row 6, the near third, east side | resource drawn from the seed |
| P Pile | column 5, row 8, the middle third | resource drawn from the seed |
| P Pile | column 2, row 9, the middle third, west side | resource drawn from the seed |
| P Pile | column 10, row 11, the middle third, east side | resource drawn from the seed |
| P Pile | column 2, row 14, the far third, west side | resource drawn from the seed |
| P Crystal pile | column 6, row 18, the far third | |
| S Hermit's Hollow | column 6, row 1, the near third | learn the first of the 2 skills he names (it counts as a rank, like a level-up pick), or learn the second |
| S Knucklebone Table | column 9, row 4, the near third, east side | stake 100 gold: a 4, 5 or 6 on one die pays 250 back, or stake 100 gold: a 6 pays 700 back |
| S Wax-Sealed Coffer | column 5, row 6, the near third | take the 300, 400 or 500 gold on its lid, or break the seal: 2 times the gold and as much XP, but its trap kills 20% (at least 1) of your costliest stack |
| S Drifters' Fire | column 10, row 8, the middle third, east side | hire the whole band (12 Spearmen, 10 Dire Wolves, 8 Archers or 6 Shieldmen) for 50% of their price, or a third of them (at least 1) join for nothing |
| S Lookout Crag | column 3, row 12, the middle third, west side | lift the fog 7 tiles round the crag, or lift it 1 tile round every lair still guarded and Haskett’s lair |
| S Ember Cairn | column 7, row 16, the far third | +1 attack for every stack in every battle, for the rest of the match, or +1 defence, the same way |
The two dwellings: the Wolf Lodge on the near third, west side and the Drake Roost on the far third, east side. The mines: ore on the near third, west side, behind a few and wood on the far third, east side, behind a warden.
More: The Causeway Meres · what mines, dwellings, piles and chests give · lairs · Haskett · Warpath
Play A new Conquest match lands on one of the maps; the first on a device is always The Causeway Meres.